ME218B WINTER 2022: POWERPUFF BOT
  • Overview
  • Mechanical
  • Electrical
  • Software
  • Bill of Materials
  • Team
  • Gems of Wisdom

Overview

Picture
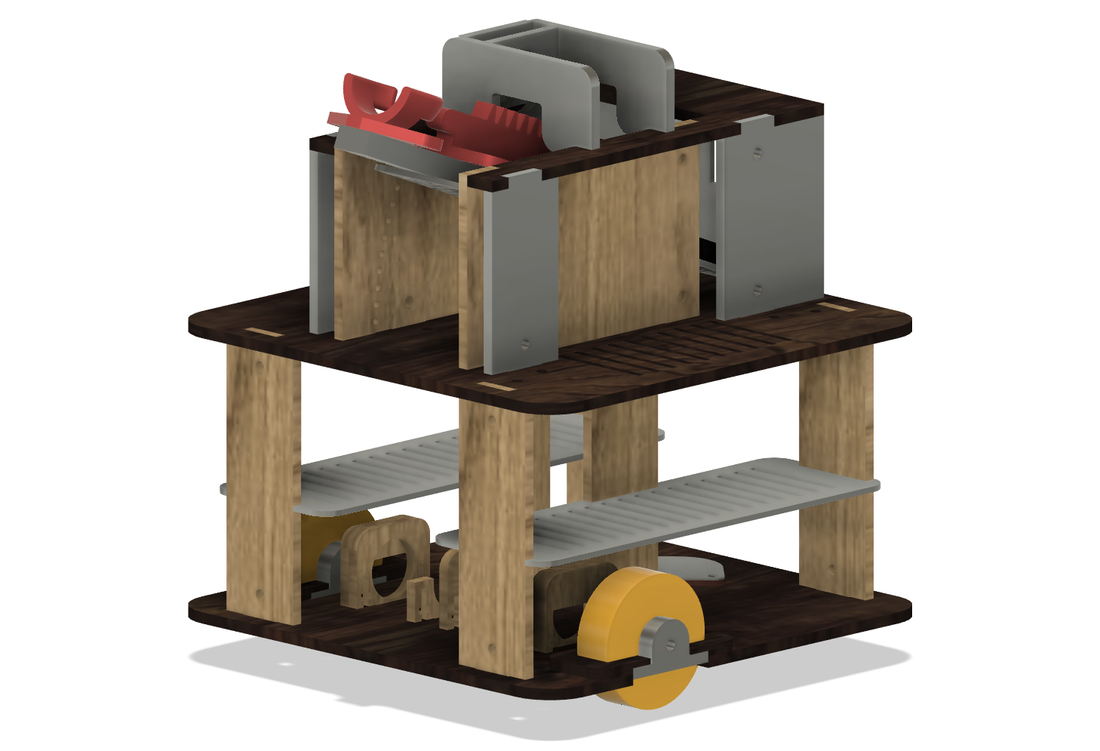
The Powerpuff Bot was built using Duron, rollerblade wheels, a caster wheel, shaft bearings, and standard hardware store fasteners. Additionally, the launcher mechanism and reload column were 3D printed.

Assembly Component Drawings

All flat parts with drawings shown below were laser cut out of 1/4" Duron, with the exception of the circuit platforms, which were cut out of 1/8" Duron.

Drivetrain Assembly

Picture
The drivetrain was assembled using pieces of Duron to hold all of the pieces in alignment. The wheels were press fit with a quarter-inch shaft. The shaft was supported by shaft bearings on either side of the wheel. We used a coupler that was fastened to the motor and the wheel shaft using set screws. We supported the motor using two pieces of Duron: one with a circular hole that held the motor, and a face that we used to keep the motor from pushing forward against the wheel. Finally, a shim was used between the encoders on each motor to keep everything geometrically in place. We provided additional support to the assembly using hot glue.
Assembly CAD

Launching Mechanism

The gear, rack, and pinion were all 3D printed, while the remaining parts were cut out of Duron. This mechanism is inspired by the auto-crossbow. We press fit a shaft coupler into the pinion to couple it to the motor, and had a limit switch to keep track of when the rack had made a full cycle.
Launcher Parts

Reload Mechanism

The reload mechanism is a simple 3D-printed tube that houses two servos and their extended arms. The purpose of the reload mechanism is to release the next ball into the launch position while holding the other queued ball(s) safe in the tube. Through software, we direct the bottom servo to open for half a second, then close again, releasing the first ball, then we direct the top servo to similarly open and close to queue up the next ball.
Picture
Picture
Reload Parts
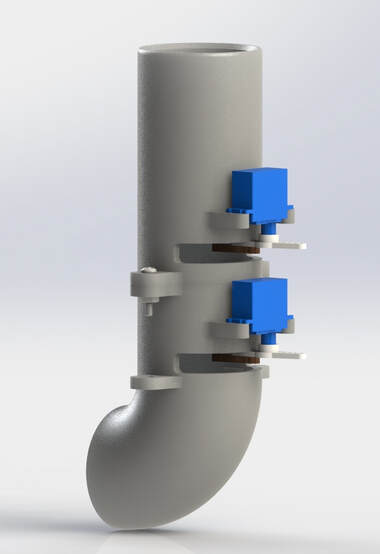
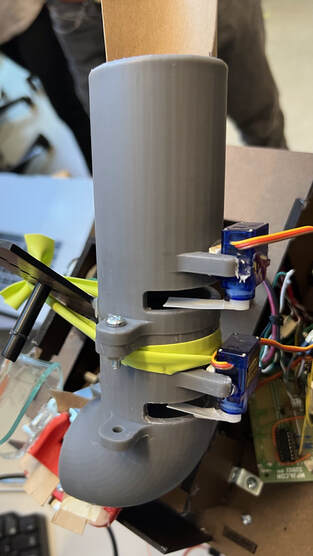
We 3D printed the reloader tube as two separate parts since the entire tube was too large to fit on any available printer. We printed it on the Form3 using Formlabs Gray Resin. We added flanges for easy assembly with 6-32 screws and nuts. The tube has two slots and two sets of arms, a pair for each reload servo. The bottom tube also features flanges for assembly onto the main chassis via standoffs (however, we ended up using adhesives).
​
The servo reloader arm is a simple laser-cut Duron piece that screws into an attachment on each servo and holds the balls in their desired places inside the tube.
Powered by Create your own unique website with customizable templates.
  • Overview
  • Mechanical
  • Electrical
  • Software
  • Bill of Materials
  • Team
  • Gems of Wisdom